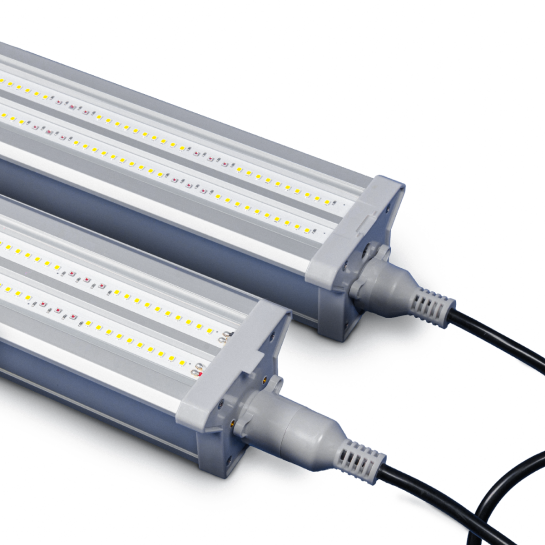
Craft Farmer UnderCanopy Light


About this product
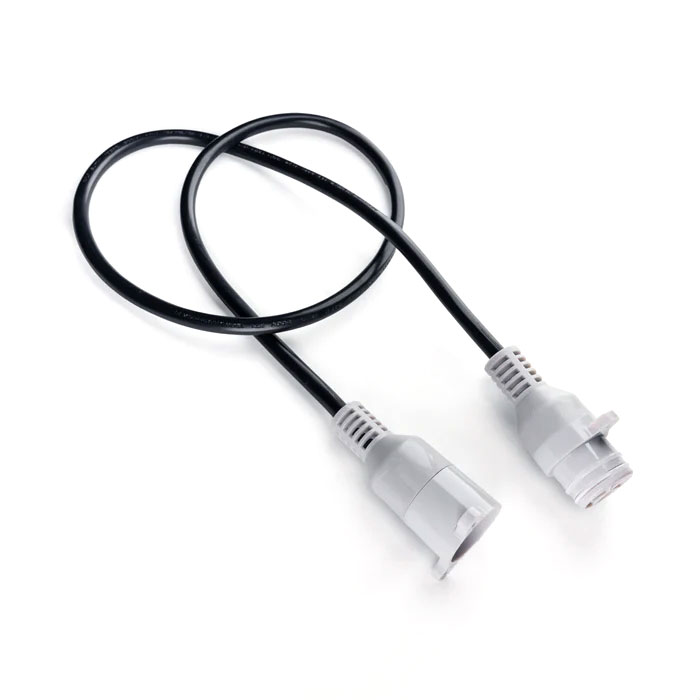
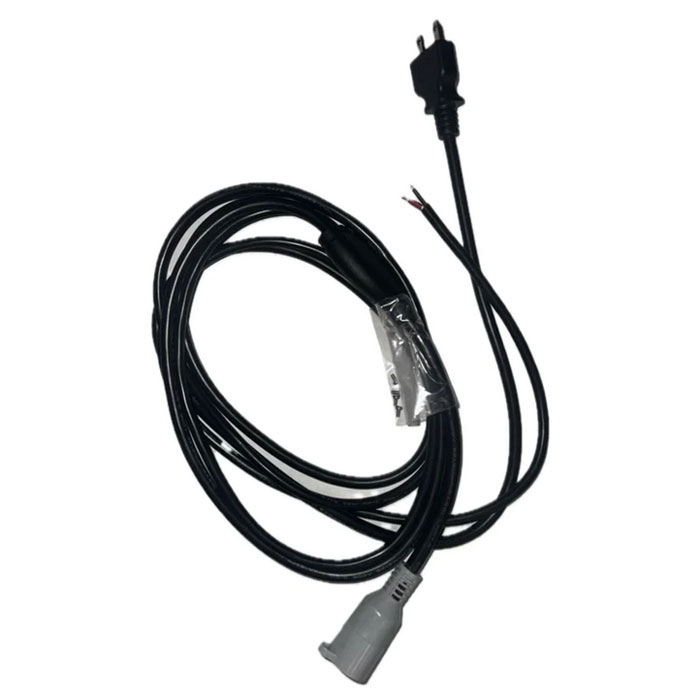
Please note that the required cords for these fixtures are sold separately and individually.
Lights are voltage sensing from 120 - 277v and work in all applications. The amount of lights you can daisy-chain together depends on the voltage you are running them out. See below:
120v = 8 pieces @ 1 Amps Each
208v = 13 pieces @ .57 Amps Each
240v = 15 pieces @ .5 Amps Each
277v = 18 pieces @ .43 Amps Each
UnderCanopy Standard Operating Procedures
Super heavy plant density is not necessary when using UnderCanopy lights. A better approach is to maintain a balance between canopy and plant density, ensuring more airflow and buds throughout the plant. This method reduces the chances of mold issues.
It is suggested to run 3 lights per 4x4 or 4x5 area. All the results posted online are based on running these 3 lights per 4’ of bench. Running 2 lights per 4’ will also yield great results.
For optimal results, Craft Farmer advises running 9 plants per 4’ of table per 3 UnderCanopy lights. It is preferred to use 4’ wide benches over 5’ because the same number of plants (9) are used per 5x4. So, for every 8’ of bench, there are 18 plants. This has been found to be the best approach for maximizing bud and large flower growth below the canopy. If a decision is made to run more plants (12 per 4’ of bench), a light skirt and heavier defoliation are recommended. UnderCanopy lights will work for any style of cultivation. Adding more plants can yield more weight, but it may increase risk factors like PM and mold.
Craft Farmer offers a wealth of cultivation technology, including in-depth explanations and terms of crop steering and high-level indoor cultivation at www.craftfarmeracademy.com. Whether you are a beginner or an expert, you will learn and improve, thereby enhancing your bottom line.
When adding UnderCanopy light, consider the Daily Light Integral (DLI). DLI describes the number of photosynthetically active photons delivered to a specific area over a 24-hour period. By adding UnderCanopy lights, you are adding 360 watts (if running 3 lights). This allows you to run your overhead lights for 11 hours on and 13 hours off, saving more energy and money than what you were paying before using UnderCanopy lights.
- Day 1 of flowering stage: Install a 3-level trellis. This trellis is crucial for supporting the lower branches that will bear heavy flowers.
- Day 7 of flowering stage: Remove the lower few leaves and any small, weak branches. This will expose your drippers, making them easily visible.
- Day 14 of flowering stage: Increase the EC (Electrical Conductivity) by 0.3 to 0.5. Do this before installing lights and turning on the UnderCanopy lights. Start reducing the EC again on Day 41, after the second leaf removal.
- Day 16 of flowering stage: Install and turn on the UnderCanopy lights. This helps to minimize sprays and power consumption.
- Between Day 19 and 21 of flowering stage: If necessary, perform a light cleanup at the base of the plant, exposing 6 to 10 inches above the grow medium. Remove all large stem leaves and medium fan leaves. This should account for about 60 to 65% of the leaves on the plant. Do not pluck the leaves; instead, remove the entire leaf and stem.
- Day 41 of flowering stage: Perform a major leaf removal in the canopy. The goal is to remove all large fan leaves up the plant to improve airflow.
- Until the end of harvest: Keep the UnderCanopy lights on.
Remember, each plant is unique and may require slight adjustments to this schedule. Always monitor your plants closely and adjust as necessary. Happy gardening!
A Guide to Under Canopy Lighting in Commercial Crop Production
Is it beneficial for cultivators to incorporate under canopy lighting in their commercial crop production facilities?
Summary Findings
Based on our research and customer trials, it appears that many indoor cultivators could enhance their Controlled Environment Agriculture (CEA) or greenhouse facilities by adding under canopy lighting.
What Problems Do Under Canopy Lights Solve?
Indoor growers face substantial expenses, including rent, electricity, labor, and the costs of creating an ideal indoor growing environment from scratch. This involves adding humidity, CO2, irrigation, drainage, sterilization, dehumidifiers, HVAC, and other heavy equipment. These operational costs lead to high overheads, necessitating the maximization of production output and quality to generate profits. As a result, many growers are packing more plants into a smaller footprint than those grown in greenhouses and outdoors.
As density increases, the light levels on the crop decrease. Dense canopies cause plants to shade each other from the light above. Light levels inside and around the sides of the canopy can be significantly reduced from optimal levels, making it challenging for many cultivators to achieve the correct micromole on the crop.
Light intensity, a crucial variable for yield, can significantly impact production when growing indoors, especially in low-ceiling environments or with medium or low-quality fixtures that have degraded over time.
Why Are Under Canopy Lights the Solution?
We’re not suggesting that under canopy lights are the solution for every farm. If your crop doesn’t require additional light or if increased lighting won’t result in higher yields, we recommend allocating your resources elsewhere.
However, there are many situations where the benefits of under canopy lighting are clear.
In low-ceiling environments where light levels are intense and concentrated but not evenly dispersed across the canopy, some plants inevitably won’t receive optimal light levels. Adding under canopy lighting is an easy way to distribute photons across crops that can’t receive the desired levels from above.
If a farm is using old lamps in their HPS fixtures or early model LED lights with lower than ideal output, it may be cost-prohibitive to make large investments in infrastructure. Under canopy lights are less expensive and supplement ceiling-mounted lights to reach target levels.
Increased crop density and plants with thick canopies can’t always get optimal light levels from fixed-position indoor lights. Even if the output is sufficient for some plants, it’s common to find areas of lower light levels or dead zones. Adding under canopy lights improves uniformity and consistency across the production floor and throughout the crop’s canopy.
In nature, trees, vines, and bushes produce more volume and larger produce on the part of the plant closest to the sun and therefore receiving optimal light levels. Therefore, it’s common to find more produce on top of trees and plants as opposed to the bottom branches and shoots. When under canopy lighting is added, we’ve found increased production levels on the branches and shoots toward the bottom or underside of the crop. What would have been small and infrequent produce is now medium-sized and more abundant.
Are Under Canopy Lights Worth the Investment?
Here are some factors to consider:
- What are the light levels your crop is currently receiving, and are they sufficient?
- What is the electricity cost for operating under canopy lights? Remember to check the operating voltage at your facility.
- What is the yield and quality enhancement that can be expected in your garden/farm? This depends on what you are already achieving.
- How dense is your crop spacing on rolling benches?
- Do you qualify for incentives and rebates on LED? Many states and counties offer money for LED lighting, and in some instances, lights are completely paid through incentives/rebates alone. Contact us to see if you qualify.
What Makes Our Under-Canopy Lighting Options Different?
The products we recommend aren’t standard lighting options rolling off the line at some generic production facility. Instead, our lights were trialed and tested by real growers and custom-designed to meet the following specifications:
- We wanted an aluminum housing to quickly dissipate heat away from the control board and LED diodes. This ensures longer duration of use without failure.
- Our fixture comes with a glass cover rather than plastic. This prevents scratching during cleaning, cloudiness in the lens, and undistorted spectral output.
- Fixtures can click together to reduce the need for power cords. Daisy-chain cords are only needed when multiple rows are connected to a single power cord.
- Osram and Samsung Diodes and updated color spectrum with deep and far red.
- We balanced spectrum, intensity, and coverage. By placing our fixtures on the tray, rather than mounting them in the canopy, we reach better light levels and more consistent results than other brands.
- Our products are backed by scientific principles that have been carefully fine-tuned to optimize the quality and quantity of the harvest.
- Energy-efficient design and quality-sourced components ensure maximum output and minimal power consumption.
- LED lights require durability to withstand the demands of a commercial crop production facility.
ADDED HEAT LOAD: Every 90 fixtures adds approximately 1 ton of added HVAC demand

Details
Please note that the required cords for these fixtures are sold separately and individually.
Lights are voltage sensing from 120 - 277v and work in all applications. The amount of lights you can daisy-chain together depends on the voltage you are running them out. See below:
120v = 8 pieces @ 1 Amps Each
208v = 13 pieces @ .57 Amps Each
240v = 15 pieces @ .5 Amps Each
277v = 18 pieces @ .43 Amps Each
UnderCanopy Standard Operating Procedures
Super heavy plant density is not necessary when using UnderCanopy lights. A better approach is to maintain a balance between canopy and plant density, ensuring more airflow and buds throughout the plant. This method reduces the chances of mold issues.
It is suggested to run 3 lights per 4x4 or 4x5 area. All the results posted online are based on running these 3 lights per 4’ of bench. Running 2 lights per 4’ will also yield great results.
For optimal results, Craft Farmer advises running 9 plants per 4’ of table per 3 UnderCanopy lights. It is preferred to use 4’ wide benches over 5’ because the same number of plants (9) are used per 5x4. So, for every 8’ of bench, there are 18 plants. This has been found to be the best approach for maximizing bud and large flower growth below the canopy. If a decision is made to run more plants (12 per 4’ of bench), a light skirt and heavier defoliation are recommended. UnderCanopy lights will work for any style of cultivation. Adding more plants can yield more weight, but it may increase risk factors like PM and mold.
Craft Farmer offers a wealth of cultivation technology, including in-depth explanations and terms of crop steering and high-level indoor cultivation at www.craftfarmeracademy.com. Whether you are a beginner or an expert, you will learn and improve, thereby enhancing your bottom line.
When adding UnderCanopy light, consider the Daily Light Integral (DLI). DLI describes the number of photosynthetically active photons delivered to a specific area over a 24-hour period. By adding UnderCanopy lights, you are adding 360 watts (if running 3 lights). This allows you to run your overhead lights for 11 hours on and 13 hours off, saving more energy and money than what you were paying before using UnderCanopy lights.
- Day 1 of flowering stage: Install a 3-level trellis. This trellis is crucial for supporting the lower branches that will bear heavy flowers.
- Day 7 of flowering stage: Remove the lower few leaves and any small, weak branches. This will expose your drippers, making them easily visible.
- Day 14 of flowering stage: Increase the EC (Electrical Conductivity) by 0.3 to 0.5. Do this before installing lights and turning on the UnderCanopy lights. Start reducing the EC again on Day 41, after the second leaf removal.
- Day 16 of flowering stage: Install and turn on the UnderCanopy lights. This helps to minimize sprays and power consumption.
- Between Day 19 and 21 of flowering stage: If necessary, perform a light cleanup at the base of the plant, exposing 6 to 10 inches above the grow medium. Remove all large stem leaves and medium fan leaves. This should account for about 60 to 65% of the leaves on the plant. Do not pluck the leaves; instead, remove the entire leaf and stem.
- Day 41 of flowering stage: Perform a major leaf removal in the canopy. The goal is to remove all large fan leaves up the plant to improve airflow.
- Until the end of harvest: Keep the UnderCanopy lights on.
Remember, each plant is unique and may require slight adjustments to this schedule. Always monitor your plants closely and adjust as necessary. Happy gardening!
A Guide to Under Canopy Lighting in Commercial Crop Production
Is it beneficial for cultivators to incorporate under canopy lighting in their commercial crop production facilities?
Summary Findings
Based on our research and customer trials, it appears that many indoor cultivators could enhance their Controlled Environment Agriculture (CEA) or greenhouse facilities by adding under canopy lighting.
What Problems Do Under Canopy Lights Solve?
Indoor growers face substantial expenses, including rent, electricity, labor, and the costs of creating an ideal indoor growing environment from scratch. This involves adding humidity, CO2, irrigation, drainage, sterilization, dehumidifiers, HVAC, and other heavy equipment. These operational costs lead to high overheads, necessitating the maximization of production output and quality to generate profits. As a result, many growers are packing more plants into a smaller footprint than those grown in greenhouses and outdoors.
As density increases, the light levels on the crop decrease. Dense canopies cause plants to shade each other from the light above. Light levels inside and around the sides of the canopy can be significantly reduced from optimal levels, making it challenging for many cultivators to achieve the correct micromole on the crop.
Light intensity, a crucial variable for yield, can significantly impact production when growing indoors, especially in low-ceiling environments or with medium or low-quality fixtures that have degraded over time.
Why Are Under Canopy Lights the Solution?
We’re not suggesting that under canopy lights are the solution for every farm. If your crop doesn’t require additional light or if increased lighting won’t result in higher yields, we recommend allocating your resources elsewhere.
However, there are many situations where the benefits of under canopy lighting are clear.
In low-ceiling environments where light levels are intense and concentrated but not evenly dispersed across the canopy, some plants inevitably won’t receive optimal light levels. Adding under canopy lighting is an easy way to distribute photons across crops that can’t receive the desired levels from above.
If a farm is using old lamps in their HPS fixtures or early model LED lights with lower than ideal output, it may be cost-prohibitive to make large investments in infrastructure. Under canopy lights are less expensive and supplement ceiling-mounted lights to reach target levels.
Increased crop density and plants with thick canopies can’t always get optimal light levels from fixed-position indoor lights. Even if the output is sufficient for some plants, it’s common to find areas of lower light levels or dead zones. Adding under canopy lights improves uniformity and consistency across the production floor and throughout the crop’s canopy.
In nature, trees, vines, and bushes produce more volume and larger produce on the part of the plant closest to the sun and therefore receiving optimal light levels. Therefore, it’s common to find more produce on top of trees and plants as opposed to the bottom branches and shoots. When under canopy lighting is added, we’ve found increased production levels on the branches and shoots toward the bottom or underside of the crop. What would have been small and infrequent produce is now medium-sized and more abundant.
Are Under Canopy Lights Worth the Investment?
Here are some factors to consider:
- What are the light levels your crop is currently receiving, and are they sufficient?
- What is the electricity cost for operating under canopy lights? Remember to check the operating voltage at your facility.
- What is the yield and quality enhancement that can be expected in your garden/farm? This depends on what you are already achieving.
- How dense is your crop spacing on rolling benches?
- Do you qualify for incentives and rebates on LED? Many states and counties offer money for LED lighting, and in some instances, lights are completely paid through incentives/rebates alone. Contact us to see if you qualify.
What Makes Our Under-Canopy Lighting Options Different?
The products we recommend aren’t standard lighting options rolling off the line at some generic production facility. Instead, our lights were trialed and tested by real growers and custom-designed to meet the following specifications:
- We wanted an aluminum housing to quickly dissipate heat away from the control board and LED diodes. This ensures longer duration of use without failure.
- Our fixture comes with a glass cover rather than plastic. This prevents scratching during cleaning, cloudiness in the lens, and undistorted spectral output.
- Fixtures can click together to reduce the need for power cords. Daisy-chain cords are only needed when multiple rows are connected to a single power cord.
- Osram and Samsung Diodes and updated color spectrum with deep and far red.
- We balanced spectrum, intensity, and coverage. By placing our fixtures on the tray, rather than mounting them in the canopy, we reach better light levels and more consistent results than other brands.
- Our products are backed by scientific principles that have been carefully fine-tuned to optimize the quality and quantity of the harvest.
- Energy-efficient design and quality-sourced components ensure maximum output and minimal power consumption.
- LED lights require durability to withstand the demands of a commercial crop production facility.
ADDED HEAT LOAD: Every 90 fixtures adds approximately 1 ton of added HVAC demand